How to Style a Butterfly Haircut: Hairstylist-Approved Methods That Work

This post may contain affiliate links, which means I'll receive a commission if you purchase through the link at no extra cost to you. Please read the full disclosure here.
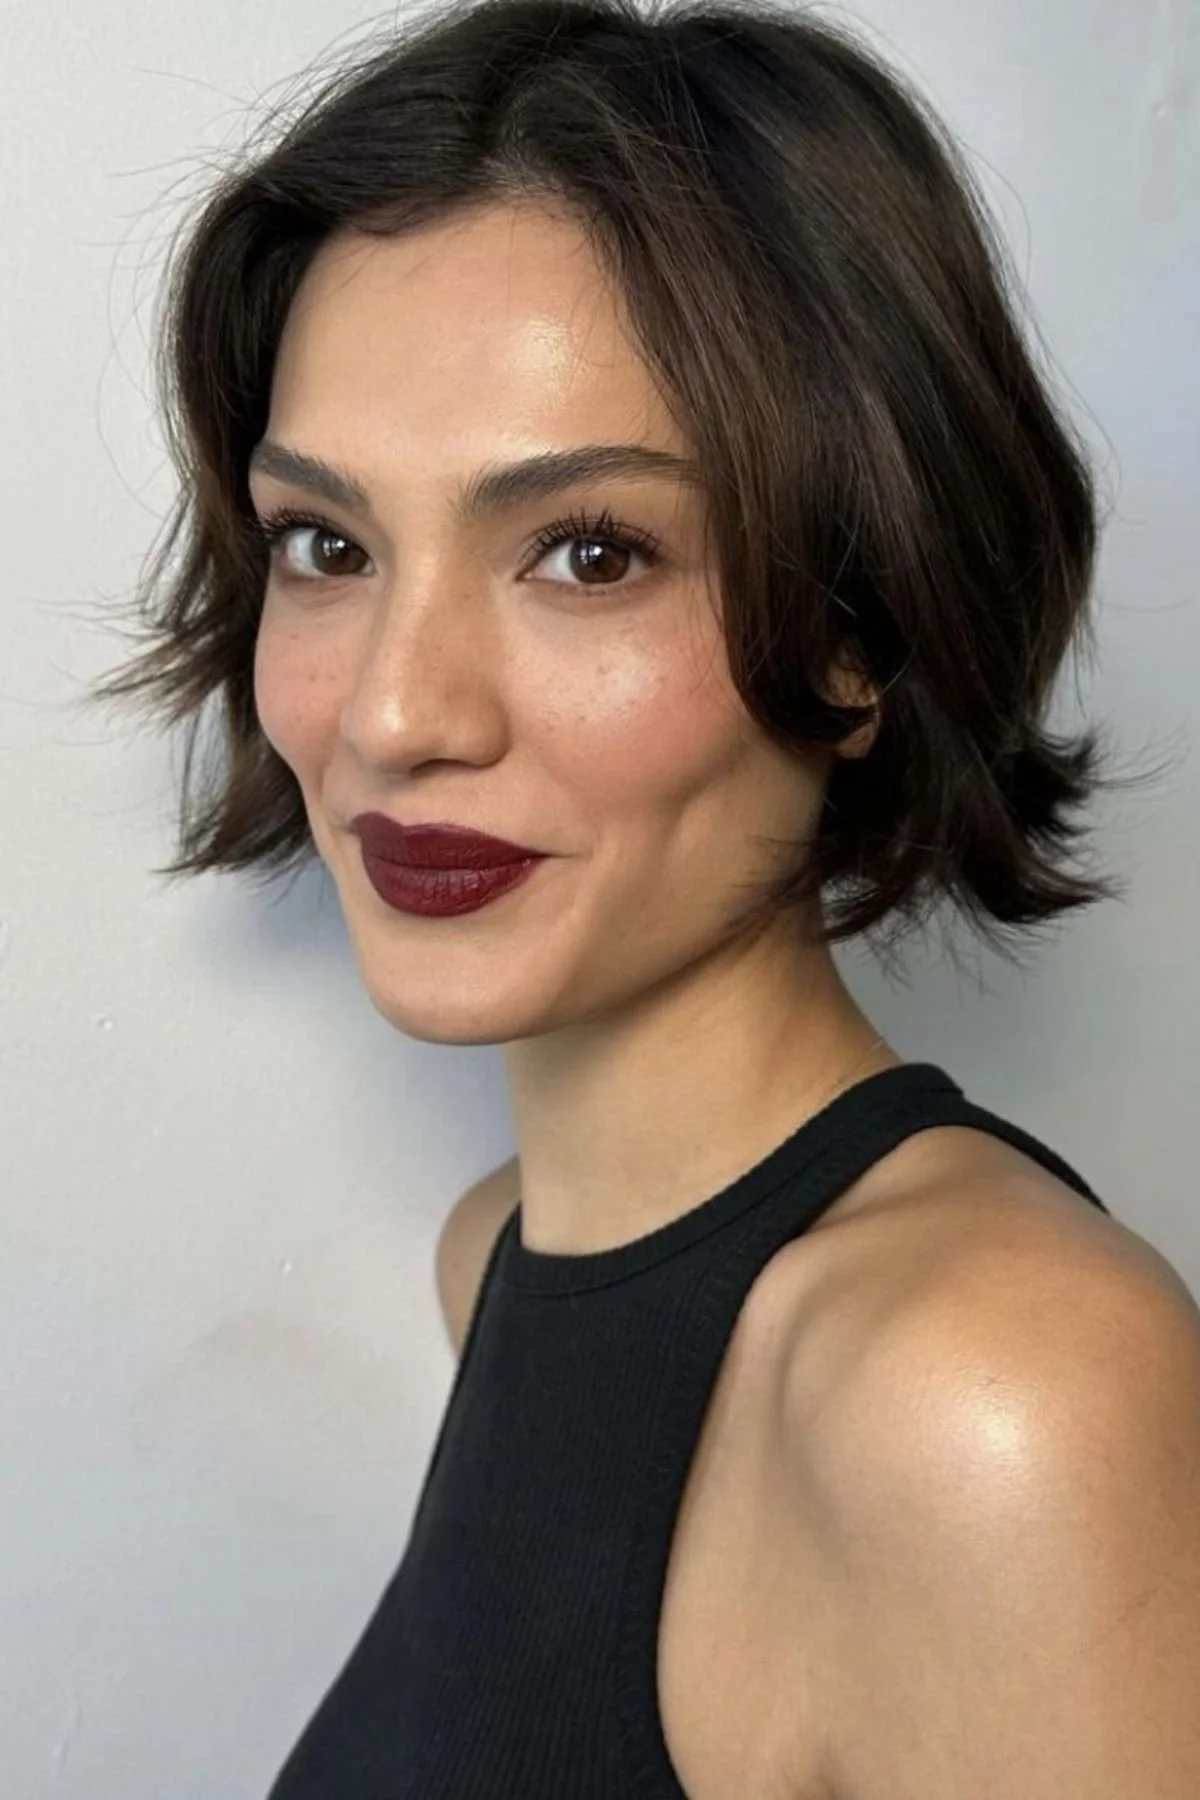
When you leave the salon with your fresh butterfly haircut, you know that feeling—the layers are feathered to perfection, and your hair has that effortless, airy bounce. Fast forward to the next morning, and suddenly, you're staring in the mirror, wondering, How am I supposed to style this?
The butterfly haircut is all about shape and movement, but without the proper styling, it can lose its definition fast. The good news? Styling it doesn’t have to be complicated. The proper techniques will bring your layers back to life, whether you want a blowout, soft waves, or a no-heat option.
This blog post covers everything you need to know—from heat-styling tricks to effortless, heat-free alternatives. No matter your skill level, you’ll learn how to style a butterfly haircut to fit your routine and keep your layers looking fresh every day.
Heat Styling Methods for a Butterfly Haircut
A butterfly haircut thrives on movement and dimension; heat styling is the quickest way to bring those layers to life. Whether you’re after sleek bends, soft waves, or full-bodied volume, the right tool and technique make all the difference. Here’s how to style it in different ways for the best results.

How to Style a Butterfly Haircut with a Flat Iron
If you think flat irons are just for sleek, pin-straight hair—think again. A flat iron is one of the best tools for styling a butterfly haircut because it helps create those soft, swoopy bends that make the layers pop. Instead of curling the hair, you’ll add just the right amount of shape to give it that effortless, bouncy flow—like you just left the salon but didn’t even try.
This method is perfect for anyone who loves a polished look without sacrificing movement. It enhances the feathered shape of the cut while keeping it sleek and controlled.

Step-by-Step Guide to Using a Flat Iron on a Butterfly Haircut
1. Prep Your Hair Like a Pro
Never, ever skip heat protectant. Flat irons can reach high temperatures quickly; the last thing you want is fried, brittle ends. Lightly mist a weightless heat protectant spray from mid-lengths to ends—not the roots—unless you want your hair to feel greasy before you start.
For extra lift at the crown, work in a volumizing mousse before blow-drying. This helps the top layers stay bouncy instead of lying flat.
2. Sectioning: Small Sections = Big Difference
Divide your hair into four sections—two in the front and two in the back. If your hair is thicker, clip up extra layers to work in smaller, more manageable pieces.
Smaller sections mean you get better control over the shape—so instead of stiff, chunky bends, you get soft, blended layers that move naturally.
3. The Technique: How to Glide & Flick Like a Pro
Here’s where the magic happens. Instead of clamping and dragging the flat iron straight down (which kills the movement), use this trick:
Start about two inches from the root—keeping a little lift at the top.
Slowly glide the flat iron down the hair shaft, and when you reach the ends, twist your wrist outward to create that subtle, feathered flip.
Repeat this for all sections, ensuring the front layers curve away from your face for that signature butterfly shape.
4. Face-Framing Layers: The ‘90s Effect
Your front layers are the most important—they set the whole vibe. To get that soft, ‘90s supermodel swoop, clamp the flat iron near the cheekbones, twist outward slightly, and glide slowly and smoothly.
If you want extra volume in the front, roll that section back into a velcro roller while you finish the rest of your hair. Let it set for five minutes, then remove it for the ultimate bouncy, face-framing flip.
5. Lock It In: The Finishing Touch
The last thing you want is for your perfectly styled layers to fall flat by noon. To keep them light, airy, and touchable, skip the heavy hairspray and go for a lightweight texture spray.
A quick spritz at the roots and mid-lengths gives your hair grip and volume without stiffening it. Run your fingers through to break up the sections, and you’re done.
Pro Tips for the Best Flat Ironed Butterfly Haircut
- Don’t press too hard. Clamping down too aggressively flattens the volume and makes hair look stiff. You want just enough tension to shape the layers.
- Use a one-inch flat iron. A larger one won’t give you the same precision, and a smaller one might create kinks instead of smooth bends.
- Keep the ends soft. Avoid over-styling or curling them too much, or you’ll lose that effortless, breezy feel.
- Flip your hair upside down. After styling, quickly shake your fingers at the roots to add even more natural movement.
How to Style a Butterfly Haircut with a Curling Iron
The butterfly haircut and a curling iron? It's a match made in hairstyling heaven. This is your go-to method if you’re looking for polished yet bouncy waves. Unlike tighter, structured curls, the goal here is a soft, effortless movement that enhances the cut’s layers without making them look overdone.

The right curling iron size makes all the difference:
1.25-inch barrel gives you defined, soft waves with more shape.
1.5-inch barrel creates looser, airy waves for a more relaxed, natural finish.
If you’re unsure, go for the 1.25-inch—it’s the sweet spot for adding that bouncy, feathered movement without looking too curled.
👉 Not sure which curling iron size is best for short hair? Check out my Best Size Curling Iron for Short Hair Guide for the perfect match!
Step-by-Step Guide to Curling a Butterfly Haircut
1. Heat Protectant: Non-Negotiable
You know the drill—no heat without protection. Spritz a lightweight heat protectant over your hair, focusing on the mid-lengths and ends.
If you want longer-lasting curls, add a volumizing mousse before blow-drying. This gives the hair some grip so the waves don’t fall flat within a few hours.
2. Sectioning: Work in Layers
A butterfly cut has built-in layers, and sectioning properly makes sure each one gets styled the right way.
Clip up the top layers and start curling the lower sections first.
Work in 1-inch pieces—too big, and the curls will look uneven; too small, and they’ll end up too tight.
3. Curling Technique: The Twist-Wrap Method
This is where a lot of people go wrong. The way you wrap the hair around the curling iron determines whether you get loose, lived-in waves or tight prom curls.
For natural, airy movement, use the twist-wrap method:
Take a section of hair and twist it loosely as you wrap it around the barrel.
Keep the ends slightly out of the curling iron for a softer finish.
Hold for 5-7 seconds, then release.
4. Curl Direction: Always Away from the Face
For that face-framing, layered effect, curl the front sections away from your face. This keeps the butterfly cut light and voluminous instead of too curled inward.
For the back sections, alternate curl directions to add dimension and movement.
5. The Cooling Trick: The Secret to Long-Lasting Curls
Once you release each curl, hold it in place for five seconds before letting it drop. This lets the hair cool and set into shape, making the curls last way longer.
If you have extra time, pin the curls up with a clip and let them cool completely before letting them down. This trick doubles the longevity of your waves.
6. The Final Touch: Make It Look Effortless
Once all the curls are in place, don’t leave them as-is. The key to a perfect butterfly haircut style is soft, touchable waves.
Run a wide-tooth comb or your fingers through your hair to break up the curls.
Spritz texture spray for that slightly undone, tousled look without stiffness.
If you need extra hold, use a light-hold hairspray, but avoid anything heavy that could weigh the layers down.
👉 Not sure which curling iron size is right for you? Take my Curling Iron Quiz to find your perfect match!
Pro Tips for the Best Curled Butterfly Haircut
- If curls look too tight, loosen them up. Wait a few minutes after curling, then gently rake through them with your fingers to relax the shape.
- Want extra volume? Flip your hair over and shake out the roots before applying texture spray.
- Day-two refresh trick: Spray dry shampoo at the roots and use a curling iron on the top layers to bring the shape back without restyling everything.
Wondering if this haircut will work with your face shape?
Get Your FREE Haircut Guide
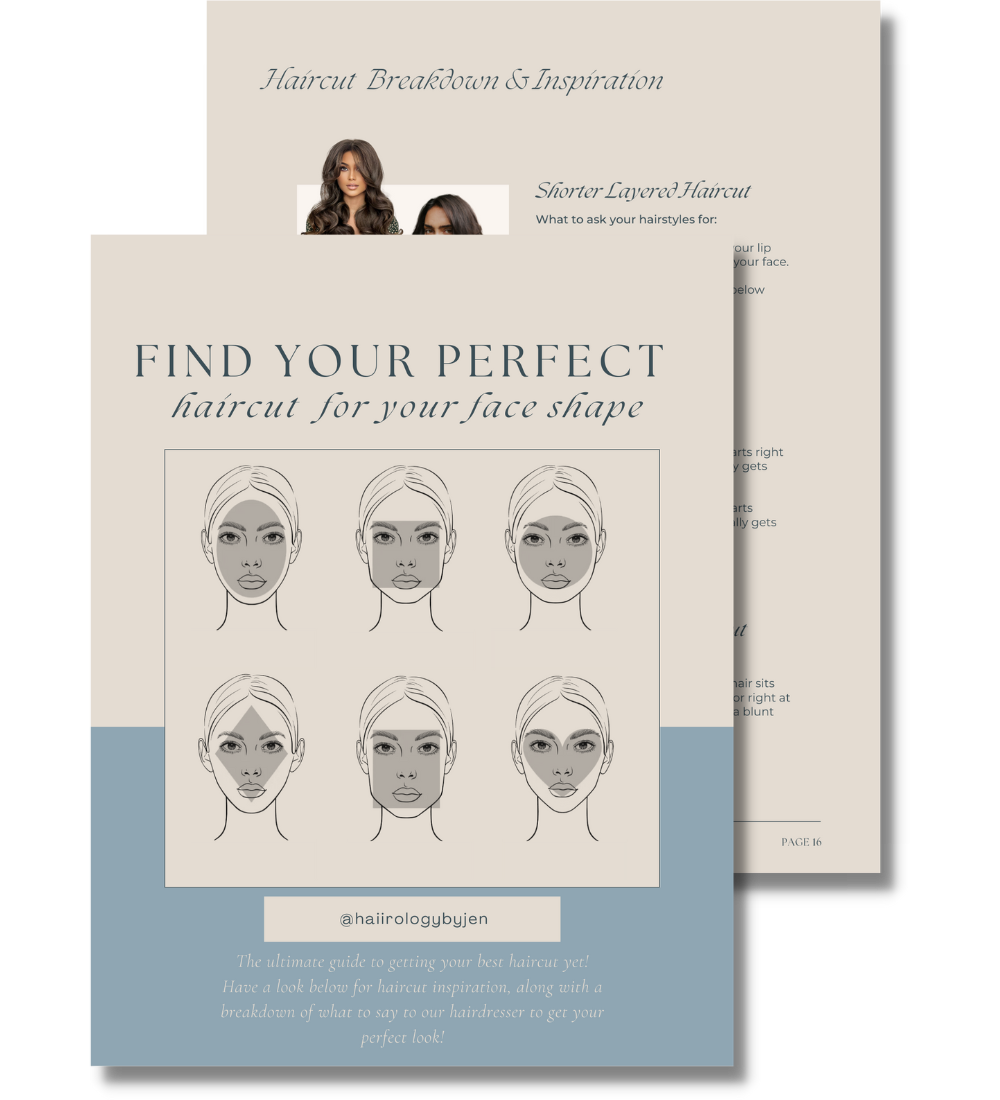
Get matched with the perfect haircut for your face shape. This free guide shows you how:
- ✅ Identify your unique face shape
- ✅ Discover personalized haircut recommendations
- ✅ Learn how to communicate your dream cut to your stylist
No spam, just great hair advice!
How to Style a Butterfly Haircut with a Round Brush and Blow Dryer
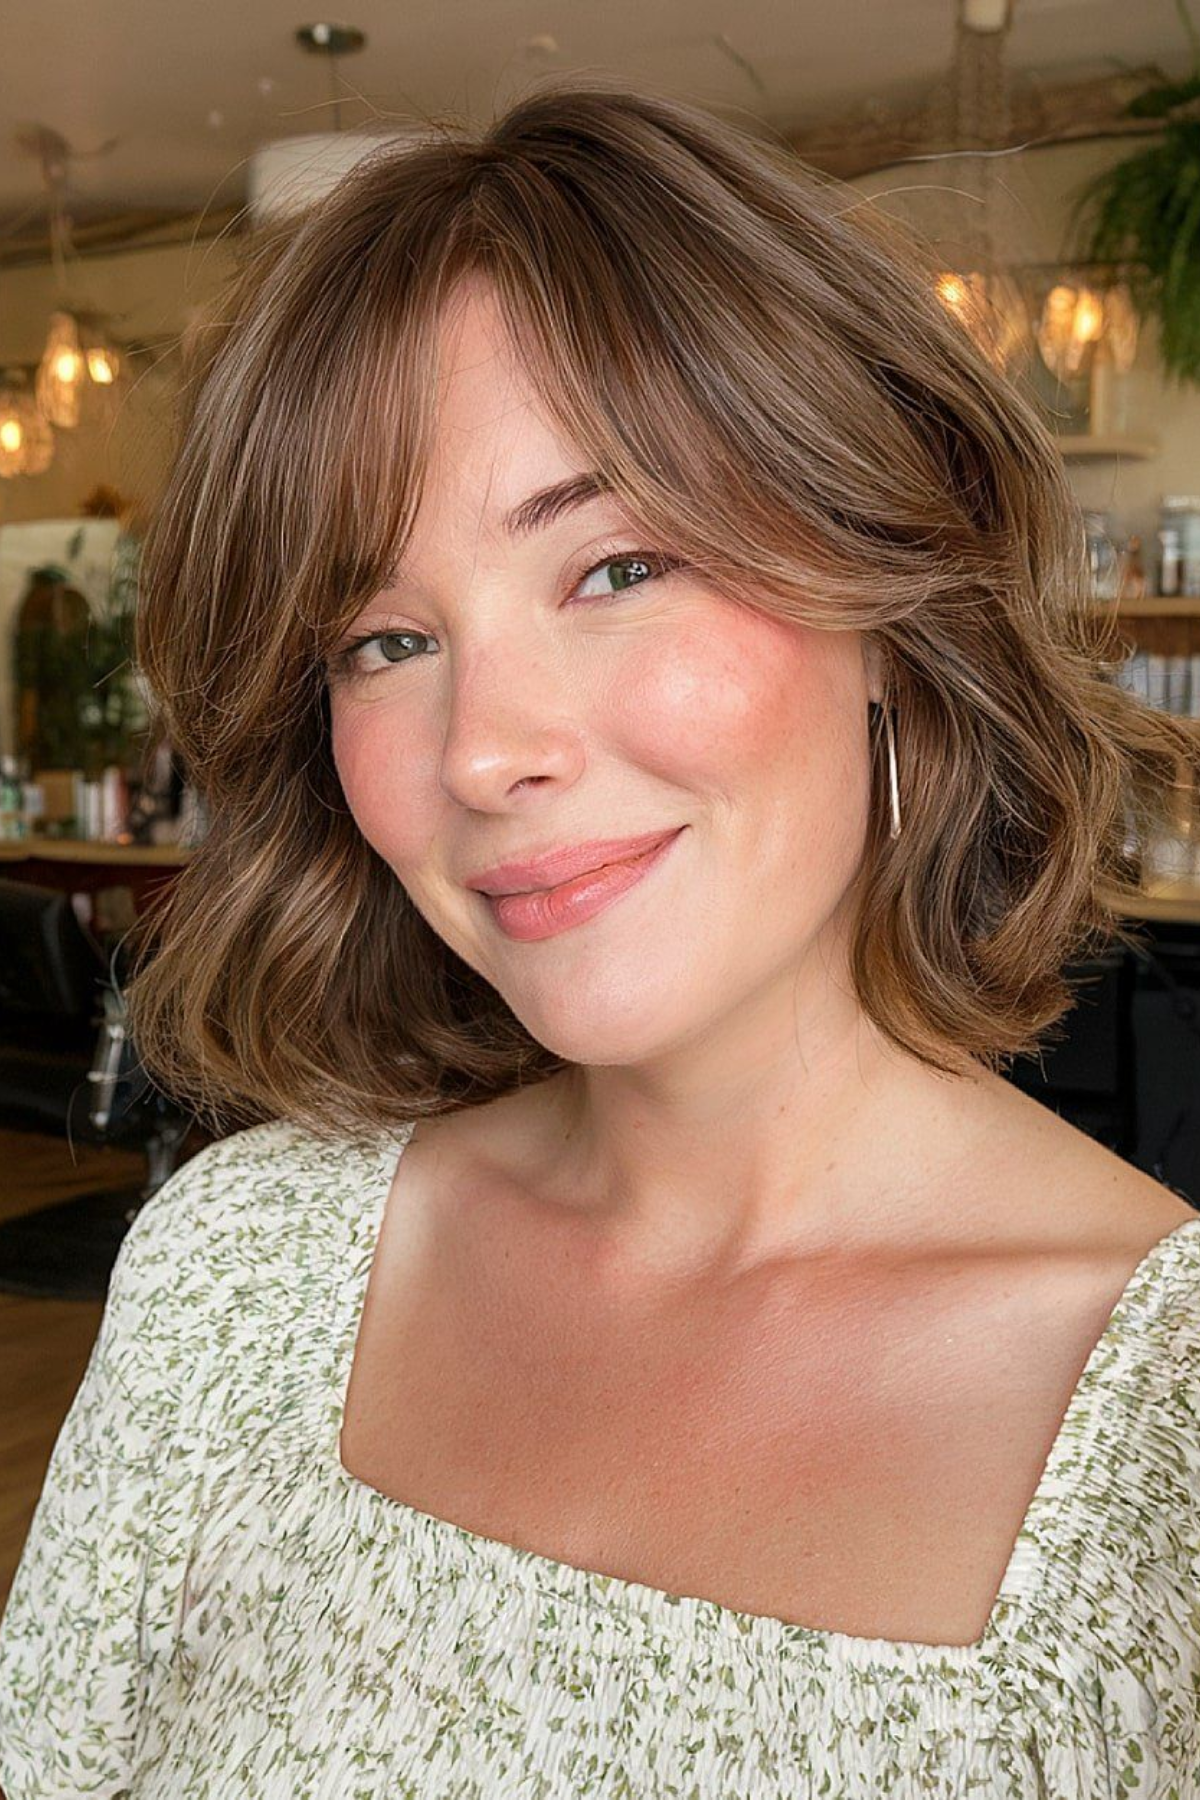
If you love that bouncy, salon-style blowout, a round brush and blow dryer are your best friends. This method gives the butterfly haircut its signature volume and movement by lifting the roots and shaping the layers. It enhances the haircut’s structure, making each layer look fuller and more defined—without looking stiff or overstyled.
The key here is technique and the right tools. With a bit of patience and the right brush size, you can create a smooth, voluminous, and flowy style that lasts.

Step-by-Step Guide to Blow-Drying a Butterfly Haircut
1. Blow-Dry Prep: Start with a Volumizing Base
For that lifted, full-body effect, always prep with a volumizing mousse before drying. This helps the layers hold their shape while keeping the hair light and airy.
Apply a golf-ball-sized amount of volumizing mousse to damp hair, focusing on the roots.
Use a wide-tooth comb to distribute the product evenly, avoiding the ends (too much product there can make the hair feel heavy).
Rough-dry your hair to about 75% dry before picking up the round brush.
Skipping this step? You’ll miss out on the lift and long-lasting bounce that make this method work so well.
2. Pick the Right Round Brush for Your Hair Length
Using the right size brush is everything when styling a butterfly haircut.
Two-inch round brush – Best for long hair, as it creates big, loose volume rather than tight curls.
1.5-inch round brush – Perfect for shorter layers, adding more definition to the shape.
👉 Not sure which round brush size is right for you? Check out my Round Brush Size Guide for the perfect match!
3. The Technique: How to Get That Airy Volume
This is where the magic happens. The way you position the brush and dryer controls how much bounce and movement your hair gets.
Work in small sections—clip the top layers up and start at the nape of the neck.
Focus on the roots first—wrap a section around the brush and pull upward while drying, directing the airflow at the roots. This lifts the hair for maximum volume.
For the ends, roll the brush inward as you dry to create a soft, rounded shape instead of straight, flat ends.
Use the cool shot button on your dryer to lock in the shape before moving to the next section.
4. Set the Look: Velcro Rollers for Long-Lasting Bounce
Set your top layers in velcro rollers for that next-level volume while they cool. This makes sure your face-framing pieces stay lifted and bouncy all day.
After blow-drying, wrap the front layers in large Velcro rollers and clip them in place.
Let them sit for at least 10 minutes while you finish getting ready.
Remove them and lightly shake out your hair for soft, touchable movement.
👉 Want to achieve salon-worthy volume? Check out my guide on Trending Blowout Hairstyles for the best styles to try!
Pro Tip for a Perfect Butterfly Blowout
Finish with a hairspray. A stiff, crunchy finish ruins the flowy effect of a butterfly haircut. Instead, use this option for a soft, flexible hold.
How to Style a Butterfly Haircut with a Dyson Airwrap
The Dyson Airwrap is hands down one of the best tools for styling a butterfly haircut. It gives you that soft, blown-out look with minimal heat damage, making it perfect for anyone who wants bouncy, voluminous layers without frying their hair.
Unlike a curling iron or flat iron, the Airwrap uses airflow to shape the hair, creating a natural, weightless effect that beautifully enhances the cut’s layers.
The trick to getting the perfect shape lies in using the right attachments.

Small curling iron barrels – Best for tighter curls that loosen into soft waves.
Large curling iron barrels – Creates bigger, bouncier curls that mimic a blowout.
If you’re aiming for salon-level movement and volume, here’s exactly how to get it.
Step-by-Step Guide to Using the Dyson Airwrap on a Butterfly Haircut
1. Start Damp: The Airwrap Won’t Work on Dry Hair
The Airwrap works best on damp hair, not soaking wet or fully dry.
Apply heat protectant + priming spray on your damp hair. Then, towel dry or rough your hair until it’s about 80 percent dry.
For extra volume and hold throughout your hair, apply a light mousse.
Skipping this step? The Airwrap won’t hold the curls properly, and the style won’t last as long.
2. Use the Right Barrel & Curl Away from the Face
The Airwrap is unique because it automatically wraps the hair for you, but the direction matters:
Use the Small curling iron barrels for an airy, voluminous look.
Use the Large curling iron barrels if you want more defined curls.
Make sure you’re curling away from the face—this enhances the feathered layers of a butterfly cut instead of making them flip inward.
3. Section and Wrap in Small Pieces for Better Hold
For longer-lasting curls, work in small sections—around 1 inch wide.
Hold the section near the ends, bring it close to the barrel, and let the Airwrap grab it and wrap it around automatically.
Keep the tool at the root for 5-7 seconds to let the airflow set the curl.
Always use the cool shot button for 3-5 seconds before releasing—this locks in the shape.
4. Let Curls Cool Before Brushing Out
This is crucial for making sure your butterfly haircut keeps its movement.
Once you finish curling a section, don’t touch it right away. Let it cool in place before running your fingers or a brush through.
If you have time, pin each curl with a duckbill clip and let them sit for 10 minutes before shaking them out. This doubles the longevity of the style.
5. The Final Touch: Keep It Light & Airy
To maintain that effortless bounce, go easy on the finishing products.
A weightless texturizing spray will give your hair a grip and body without stiffness.
If your hair struggles to hold curls, add a spritz of light-hold hairspray—but nothing too heavy, or you’ll lose that soft, lived-in effect.
👉 Not sure if the Dyson Airwrap is worth the investment? Check out my Dyson Airwrap Review for an in-depth analysis!
Pro Tips for the Best Dyson Airwrap Styling Results
- For long-lasting volume, pin your curls while they cool. This is the trick hairstylists use to make a blowout last all day.
- Use the smoothing brush attachment on second-day hair. It refreshes the volume without restyling everything.
No-Heat Styling Methods for a Butterfly Haircut
Not a fan of heat styling? No problem. A butterfly haircut is designed to have effortless movement, and you don’t need a curling iron or blow dryer to bring it to life. You can get soft, bouncy layers without exposing your hair to heat damage with the right no-heat techniques.
The pro approach? Choosing the correct method based on the style you want.
Velcro Rollers – Perfect for big, blown-out volume that mimics a salon blowout.
Sock Curls – Creates loose, natural waves with a more relaxed, undone finish.
Braiding Method – Best for defined, frizz-free waves that hold their shape all day.
Step-by-Step Guide to Overnight Heatless Curls
Prep: Set Your Hair Up for Style
The key to long-lasting, heat-free curls is starting with the right product.
Apply a light mousse to damp hair. This helps hold the waves without making them crunchy.
Comb through to evenly distribute the product and let your hair air-dry until it’s about 80% dry. Too wet? It won’t dry overnight. Too dry? The curls won’t set properly.
Pick Your Overnight Curling Method
For Soft, Bouncy Volume: Velcro Rollers
Use medium-to-large velcro rollers for that classic salon blowout look.
Wrap sections of hair away from your face, securing them with clips if needed.
Cover with a silk scarf to keep them from slipping overnight.
For Loose, Lived-In Waves: Sock Curls
Split hair into two sections (or four if you have thick hair).
Wrap each section around a long sock or robe belt, tying it securely.
Keep it loose at the roots so you don’t wake up with weird kinks.
For Defined, Frizz-Free Waves: Braiding Method
For beachy waves, do one or two loose braids.
For more defined curls, try multiple smaller braids.
Secure the ends with soft scrunchies to prevent breakage.
Secure the Style Without Tension
No matter which method you choose, make sure your hair isn’t pulled too tight. This helps avoid scalp tension and unnecessary frizz when you wake up.
Use a silk or satin scrunchie instead of regular elastics.
Sleep on a satin pillowcase to reduce friction and frizz.
The Morning Touch-Up: Wake Up, Shake Out, and Set
Once you remove the rollers, socks, or braids, don’t brush your hair immediately—instead, let the curls settle for a few minutes.
Flip your head upside down and shake out the roots with your fingers.
Use a wide-tooth comb or just your hands to separate the waves.
Spritz a texturizing spray to add grip and enhance the movement.
How to Style a Butterfly Haircut with Mousse, Salt Spray, or Dry Shampoo

Styling products can work if you want to enhance your butterfly cut’s natural movement without spending time on rollers or braids. A few key products can help you achieve volume, texture, and lift—all without heat.
Mousse – Adds lightweight volume and soft hold, making the layers pop without stiffness.
Salt Spray – Gives a beachy, tousled effect, perfect for an effortless, undone look.
Dry Shampoo – Absorbs oil while adding instant root lift, refreshing the style on second-day hair.

Best Products for Butterfly Haircut Styling
| Product | Best For | Buy Here |
|---|---|---|
| Olivia Garden Ceramic + Ion Speed XL Round Brush - 2 1/8" | Creating volume and movement | Buy Here |
| BaBylissPRO Nano-Titanium & Ceramic Ultra-Slim Flat Iron (1") | Sleek styling & face-framing layers | Buy Here |
| ghd Soft Curl - 1.25" Curling Iron | Soft, bouncy curls for layered styles | Buy Here |
| Dyson Airwrap Multi-Styler Complete Long | Effortless waves & volume | Buy Here |
| BaBylissPRO Ionic & Nano-Titanium Portofino Hairdryer | Fast drying & frizz control | Buy Here |
| DESIGNME PUFF .ME Volumizing Mousse | Boosting volume & hold | Buy Here |
| Moroccanoil Perfect Defense Heat Protectant | Protecting hair from heat styling | Buy Here |
| Bumble and bumble Thickening Dryspun Volume Texture Spray | Enhancing volume & texture | Buy Here |
| Amika Perk Up Dry Shampoo | Refreshing hair & adding lift | Buy Here |
How to Refresh Day-Two Butterfly Hair
Woke up to flat, lifeless layers? No need to start from scratch—your butterfly haircut can quickly be revived with the right touch-ups. Second-day hair holds shape better than freshly washed hair, so it takes a few quick tricks to bring back the volume and movement.
Reviving Flat Layers with Dry Shampoo
When your roots start to look greasy, dry shampoo is your best friend. But instead of just spraying and walking away, use this pro trick for maximum lift:
Hold the dry shampoo about 6 inches from the roots and mist lightly.
Let it sit for 30 seconds to absorb excess oil.
Massage it into the scalp using your fingertips to create instant volume.
Adding Bounce Back Without Washing
If your hair feels limp, don’t reach for the shower—just flip it upside down.
Shake out the roots with your fingers to separate the layers and restore movement.
If you need extra help, spritz a lightweight texturizing spray for added grip and bounce.
Run your hands through the ends to fluff them back up—no washing necessary.
Quick Touch-Ups with a Round Brush or Curling Wand
Sometimes, all you need is a quick reshape to refresh the cut’s signature flow.
Grab a curling wand and re-curl the top layers only, focusing on the face-framing sections.
For a softer refresh, use a round brush and blow dryer on low heat to smooth and lift the roots without completely restyling.
Common Butterfly Haircut Styling Mistakes (And Fixes!)
| Mistake | Why It’s a Problem | How to Fix It |
|---|---|---|
| Curling the Layers the Wrong Way | Curling in the wrong direction can make the layers collapse into each other instead of looking feathered and airy. | Always curl away from the face to enhance the layered movement. For natural-looking waves, alternate curl directions on the back sections so the layers fall more naturally. |
| Overloading Hair with Product | Too much product can make a butterfly cut feel stiff and heavy, completely killing its soft, effortless shape. | Stick to lightweight styling products. Use a small amount of volumizing mousse at the roots, a fine mist of texturizing spray, and go easy on the hairspray. If your hair feels sticky or greasy, flip it upside down and gently shake it out to loosen up the layers. |
| Not Using the Right Tools for Their Hair Length & Texture | Using the wrong tools can flatten the layers or make them harder to style. |
Shorter hair? Use a smaller round brush (3/4 inches) for better control. Thicker hair? Go for stronger hold styling products to keep volume in place. Fine hair? A light mousse and dry shampoo will add fullness without weighing it down. |
| The Butterfly Haircut & 2025 Hair Trends |
|---|
| Curious about the butterfly haircut or the biggest hair trends for 2025? Check out these must-read guides: Whether you're thinking about trying the butterfly cut or staying ahead of the latest hair trends, these expert insights will help you make the right choice! |
Final Thoughts
Think back to the first time your stylist spun the chair around, and you saw your butterfly haircut in full, layered glory. It had bounce, shape, and effortless movement—but let’s be real, keeping that look beyond day one takes the right styling tricks.
Now, you know exactly how to style a butterfly haircut, whether you want a blowout with volume, soft waves, or a no-heat, low-maintenance approach. The best part? Once you find your go-to method, styling becomes second nature.
So, are you team heat styling or heatless curls? Either way, your butterfly cut is about to look amazing—every single day.
Want more product recs from Jen?
Now that you’ve learned everything you need to know about the butterfly haircut, the real question is: do you know how to keep it healthy at home?
If not, don’t worry! I’ve got you. As a hairstylist of 10+ years (and a product junkie who’s tried it all), I’ve rounded up my top hair tools, styling picks, and everyday must-haves in one easy-to-shop page. P.S. I even snuck in a few of my beauty + outfit faves!
Explore Jen’s FavoritesFind out whether or not the butterfly cut is the perfect match for you face shape!
Get Your FREE Haircut Guide
Get matched with the perfect haircut for your face shape. This free guide shows you how:
- ✅ Identify your unique face shape
- ✅ Discover personalized haircut recommendations
- ✅ Learn how to communicate your dream cut to your stylist
No spam, just great hair advice!


Struggling with styling? Discover low-maintenance haircuts for women over 40 that add volume, flatter your face, and save time every day.